Saturday, 17 November 2018

More paint, board start

The following photos were made on my 10.5" iPad Pro. I keep getting blown away by how good the photos come out on that thing! Too bad it's not easier to carry around.

The first two I took in order to record that I'd put a second coat of paint on the insides of the storage areas:


In the next photo you can just make out the line showing the intended foil shape on the blank piece of foam that John gave me to use for the off-centre board:
I've made some cuts on the table saw to get rid of unwanted chunks of the foam, which is a very stiff, stable foam that has glass fibres throughout. John had it in his shop for decades, and now it has a good use. It's a dream to shape; I'm using 40-grit sandpaper, which takes the foam down evenly and smoothly. It makes it so much more fun! Stop turning in your grave, Michaelangelo—no chipping away stone for me!
(Sorry about this... had to use it somewhere!)
In the photo below, the pattern for the foil shape is closest to the camera on the "bench"(sandpaper sitting on it). Next along is the hatch cover for the after hatch; then the board core, which is 48" tall, 1½" thick, and 12" front-to-back.
The foil shape is NACA 0012, which is supposed to be ideal for boat foils. I found the correct shape in a pic on the internet, brought it into a drawing program on the computer, took it up to the desired size, and printed it on some card stock, which I then cut to draw around for the pattern. The board will be glassed.


Thursday, 15 November 2018

Storage areas painting

First coat of paint on interior of storage areas:
 
Benches are finished, cockpit floor has a layer of 1-oz mat on it, for wear resistance from sand which will inevitably follow the feet in.

Paint is Tremclad high-gloss white enamel. I plan to apply at least one more coat. Latex/acrylics just aren't durable enough for hard wear, and I'm saving the more expensive urethanes for the exterior.

The undersides of the decks got the same treatment. The wood that will be glued is not getting any paint.


Saturday, 10 November 2018

Glassing bench corners

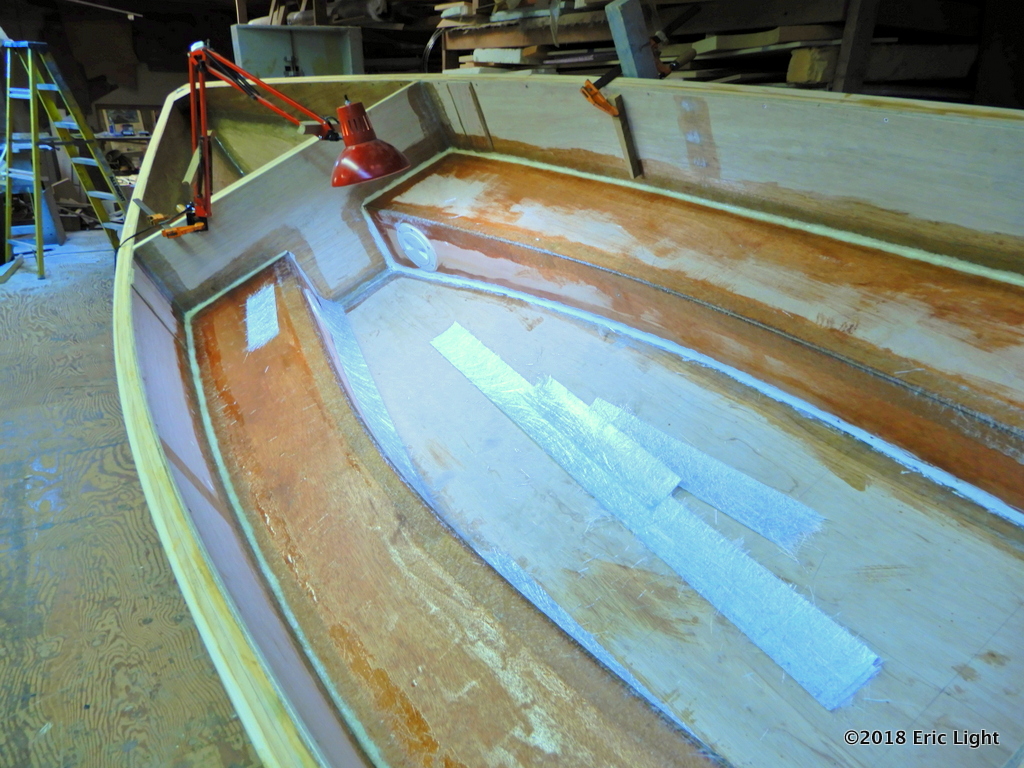
I rarely do photos of my work in progress, but today I needed to rest my back from leaning in, so had a photo break. Here I'm getting ready to put 1.5-oz glass mat strips on the inside bottom corners of the benches. (The benches added to the build will further strengthen the chine and bottom corners, and stiffen the boat so it will be impossible to twist it.) The top corners of the benches, inner and outer, are already done.


I'm sealing the plywood with resin as I go, by using up any leftover mixed batches on any untreated surfaces.

To make it easier to reach in, the boat is held at an angle on its bilge plank by that 2x2 clamped to the other side.


Monday, 5 November 2018

Does it fit?

The benches as drawn looked very low, so I was curious all along to see how seats would work in this boat that was designed to have a completely open cockpit with no furniture at all to clutter what could be a sleeping platform. 

So after the glue* for the seat tops had cured, I humped the boat down off the workbenches and got into it. I put the camera on a ladder rung with a little wedge of hard foam under it to point it downward. 10 seconds was barely enough time for me to get into the boat and look at the camera, which is why it didn't catch me smiling:
I think it works well for me, so I'm happy. The seats are a little low, but the height of the back rest is good. Too bad I didn't think to place the decks on for the photo!

In the forward storage space (bottom of the photo) the bottom and sides have been glassed with 1.5-oz mat in anticipation of anchor and chain wear.

The benches feel totally solid; no flexing under my weight. The sprawl feels a little tight, but I'll go with it. I enjoy that there's no centreboard box breaking up the footwell area.

Lots of grinding and sanding to do now, to round all of the corners, then glass mat will go on all of the joints.

* For glue I used resin with chopped glass strand and a some microballoons to thicken it a bit. I've gone all-in on polyester resin for this boat, since it's so much easier to use:
• the ratio of base to hardener is not critical: in the winter, use more hardener
• mixing is not as critical; epoxy really needs to have the two parts mixed well
• it cures much faster; within hours as opposed to days for epoxy in the winter
• WEST epoxy has a blush that needs to be washed off
• if unwaxed polyester resin is used, no sanding is needed between coats

Update: Correction: I haven't exactly gone "all-in on polyester", since I used Titebond III for laminating the gunnels and for other wood-to-wood gluing. (I also tried out Gorilla Glue for the first time. I like it because it's so fast, but I prefer Titebond.)


Seating

The benches are painted entirely inside now,
tops:
and bottoms:


Friday, 2 November 2018

Paint!

You know you're nearing the end of a boatbuilding project when the paint cans come out. In this case, I'm painting whatever I didn't put resin on that will be enclosed by the benches. I'm using up some old blue-grey Tremclad that I used for some of the interior of Firefly.

The photo below shows my attempt to add more gluing area to the inside of the corner where the faces and the tops of the benches meet. The wood I wanted to use wouldn't bend enough, so I just put pieces on. That corner will be glassed on the outside, so it'll be good and strong.
And here's the blue-grey paint, looking more blue here:
I put resin on part of that area already because I was using up resin that I'd kicked that was left over from something I was doing that I didn't want to go to waste.

The two photos below show the undersides of the bench seats with the blue-grey paint on them. The unpainted areas will be resin coated in order to bond better with the resin glue.


After I glass the inside bottoms of the fore and aft storage areas, they will be painted as well, including the undersides of the decks. I'll buy some white Tremclad for those areas because they're naturally dark areas and white helps. The glass on the bottoms is in recognition that they may be subjected to anchors and chain falling on them.

Paint! Finally!


Monday, 29 October 2018

Seats (2)

Inboard faces with deck plates installed:

Sub-floor ply on bench tops:
(The port one has a piece scabbed on the forward end, to make up the width)
I'm happy with how it's turning out! I wasn't sure.
I needed to see the idea in three dimensions before I could really appreciate it.

Looks like it's going to work out just fine

The plans are for an empty, open cockpit, but, tabernack—the back!
This old body just doesn't sprawl the way it used to...
at least not without more discomfort than it's worth

I placed the decks back on so I could see what it's going to look like altogether.

Two dimensional images don't convey the depths properly...
It's a very low bench, and that's okay; it's something. I couldn't see myself sitting on the angled bilge plank without sliding down.

When I get the seat tops cut out of the good ply, I'll want to take the bench faces off and mark the undersides of the seat tops for gluing, since I won't be able to do that after the faces are on for good: