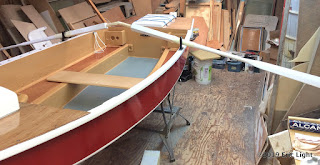
Tuesday, 24 December 2019

Next?

A Better Camp Cruiser

Although I like the Mixer2 design as it is, I do find it quite tender. So I thought I'd draw up something similar that would have many of the same characteristics as the Mixer2, but be more stable and possibly able to plane.

I wanted to go in the direction of the Goat Island Skiff, only not so big, and not flat-bottom all the way. The beauty of the bilge plank is that it allows a Vee entry at the bow. So what I did was to keep just a bit of that bilge plank amidships, and widen it a lot at the bow, a little at the stern.

I widened the bottom plank aft and straightened out the run a bit as well, so given the right conditions (lots of wind) it might plane. At any rate, it'll be much less tender, and could probably take a small motor off the transom. The sides are a bit higher off the water, so it won't be great to row, but the point is to sail as much as possible.

As drawn, this design (which I'm tentatively calling "Knucklebutt" because of that little knuckle at the bottom amidships) is 13' long by 44" wide plus rub rail, so about 4' wide. It could stand to have a bit more sail area than the Mixer2's largest sail plan, which I think was 68 sq ft—so maybe 75 sq ft.
 
The drawing below shows a narrow board within one of the bench seats, which may or may not work out. If not, then the board goes on the side as in the Mixer2.
The pink lines are metric measurements that I used to scale the plan to model size. A model is in progress.
 
Deck plan and cockpit layout:
Cockpit is 7' long
Below are the station plans with measurements, so one could build a boat from them, or put them into a hulls app to get panel shapes from. I don't have a hulls app going at the moment (it needs to run in a Windows machine), so I'm using a drawing app on my Mac, thus cannot expand the panels to find their true shapes.

Station 0.75, 9" from the bow, is where the flat bottom starts:
Station 4, 4' from the bow:
Etcetera...


Barring some miracle, I won't have a shop to build this in, so if anyone builds from this plan it would be nice to hear how it goes. If you want to dialogue, put your email address in a comment. I moderate the comments, and wouldn't make yours public without your permission, if it has your email in it.


Friday, 30 August 2019

Coupla tweaks

Oar Collars
 
I originally thought I could get away with just wrapping the loom up over the shoulder from round to square:
Trouble is, the oarlocks tended to get jammed on the corners of that ramp-up from round to square. Not a big issue, but I wanted rowing to be a smoother process.

So I ground off the wrapping of nylon twine coated in epoxy and changed the transition between round and square from a ramp to an abrupt step. I did the grinding at the shop.

Above: In my apartment, the step was cut in using my pen knife and some 40-grit sandpaper.
 
The top oar above has had the wrapping ground off. The bottom one has now had a shoulder cut into it, to butt the plastic collar against.

The re-worked area was then given three coats of paint, and the new collars fitted. The collars had to be cut down some, to fit snugly on the oars, since the oars are so slender. Otherwise, the plastic overlaps and that's not good!


Hatch Cover

I found that the foam I'd glued into the forward hatch cover was coming unglued. This is because foam has very little interlocking structure between its grains, so the layer that the glue stuck to just separated from the rest.

I wanted the foam to stay put in case the cover fell overboard, since without it, the thing would just sink. So I carved some slots in the foam and stuck in two slats that fit under the lip:
I happened to have some offcuts that were bendy enough to insert, yet stiff enough to hold the pieces of foam in. The slats had to fit under the lip on opposite sides, thus were too long to insert without bending them up in the middle first, to shorten them.
I made the cross-cuts with a saw, and took out the part in-between with a long, sharp kitchen knife.
 
Below, oars and hatch cover await return to the boat:


Saturday, 20 July 2019

Five new things

1. Cover
Made from the leftover large piece of polytarp from making the sail, plus a small tarp from the hardware store. Held on by a perimeter line threaded through grommets. The slit for the mast is on the starboard side and is held together with industrial-strength hook & loop material sewn on. Perimeter line ties there. Also, a little collar was sewn on to keep too much rain water from coming in along the mast.
 
2. Topping Lift
 Just a thin line through a plastic ring I had attached to the masthead just below the halyard fairlead, it ties to the after end of the boom/yard bundle, which will act as a tent ridgepole when camping. Maybe. We'll see. At least, we're dreaming in that direction.
The forward end of the sail bundle is held up by the halyard, and the whole thing is kept from swinging forward by the "bleater", the little line that ties the mast and boom together and keeps the boom from going any more forward.
 
3. Ensign!
Hand-sewed the little Canadian flag to the top of the leech. This is the same flag that was on the sails of both Firefly and Golightly previously. It better not be upside-down. Many checks on that account!

4. Back rests
As seen in the photo above. Close-up:
Pool noodle halves fastened on with nylon webbing through the middle hole, screwed at the ends. Creature comforts being addressed after affirmative performance tests.

5. Re-boarding loop
In the second photo above, the fuzzy rope that's holding the sail bundle on the centreline (standing in for the mainsheet) ties to a cleat on the aft bulkhead and is long enough to throw over the transom, to be used as a foot strop for boarding the boat over the stern from the water. There's a piece of rubber standard watering hose threaded onto it that is intended to be the step, which will hold the loop open for foot insertion.


Sunday, 16 June 2019

Reefed

The wind was quite brisk today, so I thought I'd put in the reef before going out. But I realized I hadn't set the jiffy-reef lines up quite right. So instead of ending at the reef grommet, they now go up to it, through it, and down the other side, fastening at the boom. It works much better, especially since this boom isn't square or round, but a tall rectangle. If the boom gets pulled sideways, it bends, so the forces on it have to be made to stay on the top or bottom and not slip around to the sides.
Reefed:
Full sail:
I also re-tied the head of the sail onto the yard, with individual ties at each grommet. The way it was—with a continuous line—there was a crease from the first grommet back from the luff, down towards the tack, which you can see from a previous pic:

The sailing today was great. The wind was strong and the mast was bending, the yard more so. The sail filled into a nice shape. It looked perfect, to my eyes.

What they say about the yard spilling wind when there's too much of it seemed to be the case today. At any rate, although it was quite gusty, she handled smoothly—though lively, as I had to play the sheet and the tiller in the gusts. At times I was sure that if she had a slightly different hull shape, she would have been planing. 

The wind in Cadboro Bay today started out SSW, then changed to SW, which was perfect, as I was able to reach from one end of the bay to the other. Off Cattle Point (which I'm guessing is the southern end of Cadboro Bay), the wind picked up considerably. And it picked up over the whole bay as the afternoon progressed. I'm more comfortable now with stronger winds in this boat. She heeled over and stayed at the point just before the gunnels start to get wet. I never felt like there was a danger of dumping. And I never felt like I needed to hike. My weight on the windward seat bench was enough.


Friday, 14 June 2019

Sailing report

I've sailed the boat three times so far; in light, medium and strong winds. My main report is that she sails very well, but is very tippy. I cannot sit on the bench seat unless to windward in about ten knots of wind. The tiller is light, and there's a light weather helm, meaning that she is well balanced and that the sail and leeboard are lined up well.
On the beach in Cadboro Bay

 A couple little videos, sailing in about 8 knots of wind (medium):


 The first one is sailing south with Washington's Olympic Mountains on the horizon:

The second one is sailing east with volcanic Mount Baker on the horizon:


All best on a large screen, of course. The white markers are crab trap buoys.


Friday, 17 May 2019

First splash - tryout rowing

I'm very happy with the dolly: I can actually move the boat around by myself, including bringing it uphill from the water over sand. 😊

After delivering the boat to the yard on Wednesday, I spent the rest of the day clearing out all of my tools and equipment from the shop.

I really wanted to see how she floats and handles, so yesterday, Thursday, Andrew and I each took her for a bit of a spin.


Andrew checks out the oars:

Having the transom clearing the water as above is exactly what is wanted in a boat, so that the water flows off smoothly and doesn't produce turbulent eddies as it goes around that corner.


Observing the mini-12 races:


I took the board off for the rowing trials.

Harassing the goslings:
Joking of course, silly! I meant observing the goslings.

Overall I'm very happy with the build. My only complaint at this point is that she's so tippy—which I expected, but hoped wouldn't be the case. I couldn't put all of my weight on the seat bench without feeling like she was going to start shipping water. Presumably that means that I won't have to be hiking out when the wind blows, which would be a good thing for sailing. And perhaps she'll endear herself to me more as a sailboat. The oars are definitely too short to be really powerful, but they'll be fine to get me home in a calm, which is mainly why they're there; no motor needed. 


Wednesday, 15 May 2019

First daylight

Bruce (on the mezzanine) and Vidas pause to let me take a picture:
Bruce was a pro, swung her down so nice and easy. Thanks, guys!

Tied down on Bruce's trailer with a piece of carpet under her:


My assigned spot in Cadboro Bay seemed to be taken by another boat, so Vladi and I parked her in what looked like an empty spot:
I might need to ship the rudder so others can get by.


Thursday, 9 May 2019

Dolly & wheels

Bought some proper beach wheels:
And built a dolly to fit the boat:
Just made it up on the fly, all nice cedar boards, mahogany ply, epoxy, stainless screws, some Titebond III. The hole in the forward upright is for a line that will attach to the bow cleat on the boat. It has a coat of primer on it. The final coat will be grey Tremclad. The aluminum tube axle has cedar cores glued in so that the ends are solid.
 
The first iteration was built without the leeboard on the boat. Fortunately, I checked it with the leeboard in, and realized that the crosspiece on this side had to be extended an extra 4" so that the wheel is outside the board.
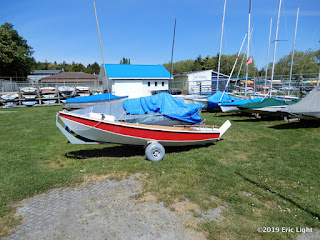
Friday, 26 April 2019

Weighing in

The plan is, when the time comes to take the boat out of the shop, to lower it from the mezzanine by rope. So today I set about putting together the lift ropes.

A few days ago, Bruce and I found that when we lifted the boat from the position of the oarlock sockets, the boat was bow-heavy. Bruce suggested using the mast partner as a forward lift point. The main lift will come from a rope that goes (through a couple of pool noodles) around the bottom of the boat and up out the oarlock sockets, with the two sides tied together above the centreline of the boat to make a yoke. The rope is knotted just above the socket on each side, so it won't slip. The yoke is tied to the mast partner to make a pyramid shape.

Today I found a chain-fall lifting mechanism in the shop. With friend Vladi's help, we set it up over the boat. I was then able to lift the boat myself and fine-tune the balance point, setting the boat down each time to re-position the knots.
I had brought my bathroom scale, so I put some foam chunks on top of it and set the boat down on it:
The bathroom scale is the pink and black thing at the bottom of the pile above. You can see that the lifting rope that goes through the pool noodle is slack. I got this picture...
by sliding my iPad in under there.

The boat weighs 140 lbs, about what I expected.


Thursday, 25 April 2019

Pretty much done

The cockpit floor has some sand-like stuff sprinkled into the paint (Tremclad) to keep me from sliding around on it, and to keep my knees raw when kneeling, I guess.

Here she is in sailing trim, coming...

...and going:
I noticed that the rudder and tiller are well-balanced, weight-wise, meaning that they'll stay in position, no matter the heel of the boat. Not sure that has anything to do with on-the-water performance, though.

Here's the off-centre board in the "up" position, with a catch-string for when the boat comes ashore:

And here it is in the "down" position:
The jam cleat on the left springs open if there's a sudden load on it, in case we hit a rock.

Now here she is in rowing trim:
The rowing thwart is untreated cedar, which I'm going to leave unfinished. It has some sheet foam glued to the underside where it lands on the bench tops, so it won't move around. I taped the oar handles together to get a sense of what they would look like in action.

The photo above shows how short the oars are (too).

As does the photo below. I'm going to be windmilling with these, I think. 😒
Looks like the oars will barely be in the water at this angle. I'll use a couple pieces of thick foam (the hard stuff) to pad the height of the thwart.

Next tasks: finish the dolly and the sail.