Friday, 3 June 2016

Rudder

With John's suggestions and help with the metal work, a rudder assembly is shaping up:
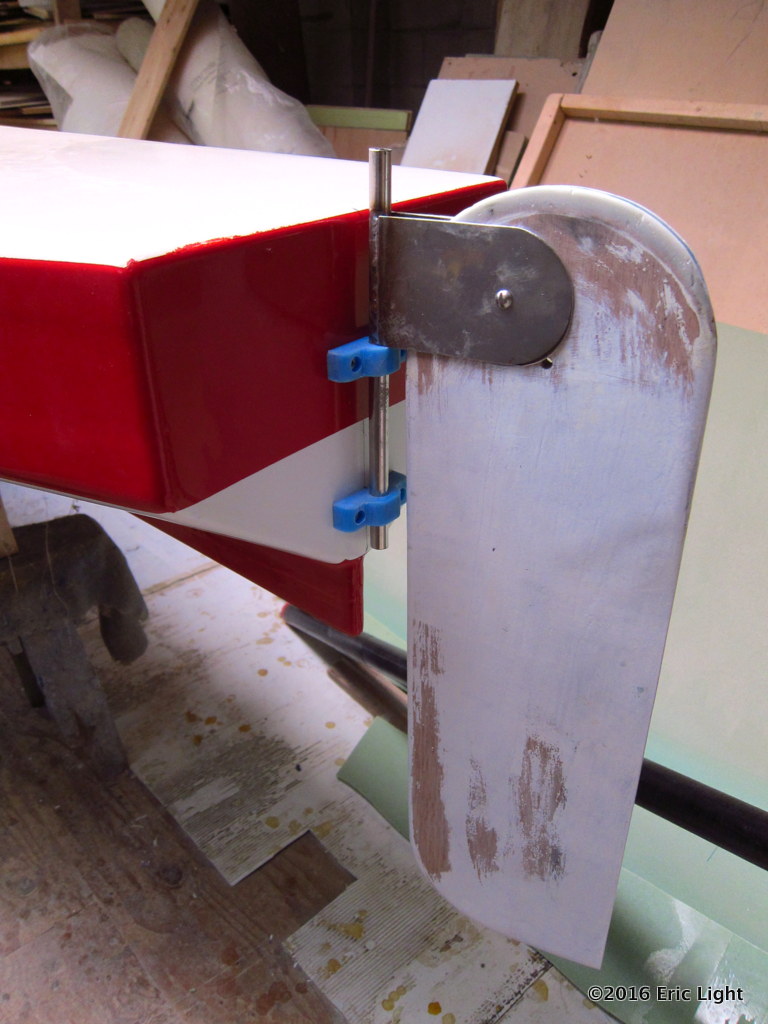
I had made the blade with the top rounded side-to-side. John showed me how to make a groove on it, to direct the down-haul line and keep it from jamming between the blade and the cheeks. I first glued down a piece of small rubber tubing, then used milled glass fibres in epoxy to make sides around the tubing. When the epoxy had kicked, the tubing came out and the sides were smoothed up, leaving a nice smooth groove in the top of the rudder blade. 
The centred hole for the original pivot will be filled. This is a much different rudder!
(The blade's surface was contaminated in places with something that kept the paint from setting up, so I scraped it off—that's why the paint is uneven.)
The tightness of the pivot bolt determines if the blade sticks in the "up" position. There will be a horizontal bar on top of the post, which the steering lines will connect to, and a pin through the post at the bottom, so the rudder can't come off inadvertently.


Wednesday, 1 June 2016

The end is nigh!

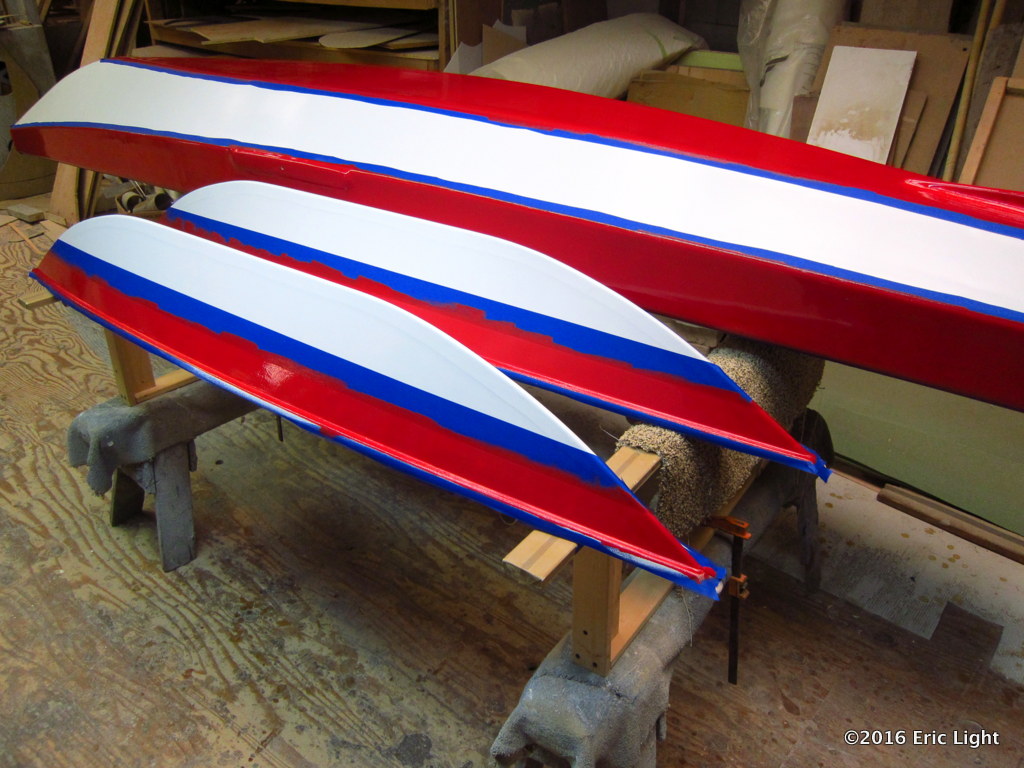
 Hulls without the blue tape:
Getting into some sky blue paint, though (access hatch covers):
The stainless steel tube and cheeks by the foremost ama are the rudder in progress. More on that later.

Hisself:
 Blue coming into the coaming as well. That white thing above on the bow is a handle. It's very light and much easier to do than rope.

Much more blue now:
The blue plastic pieces in the foreground will be my gudgeons. The blue circular pad holds a pad-eye that will anchor the ends of the steering lines and the main sheet.
The elastic cord holding the aft hatch cover in place is one piece, with the tied join hidden in one of the nylon webbing tie-downs.
The paddle was a found object with a broken blade that I replaced with foam, glass and carbon fibre.
The fore hatch cover is held on by an elastic cord that is tied to the stem. No latches, no metal.
In the photo above you can see the mast step, which is a pair of aluminum angle bar pieces with a horizontal line of holes through both, for pinning the tab at the bottom of the mast. The black strapping hanging down is my backrest, which is a piece of seat belt material epoxied in, with a buckle to starboard and a lumbar support hidden below.
The tubing under the forward end of the cockpit coaming is the turn-around for the continuous-loop steering line. 
The mast will be held into the mast partners there by rope attached to a cleat under the fore deck.

I followed this river otter along the waterfront walkway for awhile, without it sensing my presence:
It's looking out for dogs. It would move along a ways and then lie down for awhile. It was heading for the water, from the condo yards, it seemed. It happened that no-one came along but me.


Saturday, 21 May 2016

Seeing red

This is very close to the way these colours look:
I love the blue colour of the tape.
The amas have a stripe on one side only (the port side of the port ama, starboard side of the starboard ama), so that I'll know which is which at a glance. The location of the inspection hatch covers indicate orientation, as they're off-centre fore-and-aft. (They'll always be aft of centre.) I originally thought it would be a good idea to make the amas so that they go on whichever way, but I don't trust my assembly process to have achieved that. If they can go on any way, I may paint a stripe on the other side as well.
I wanted to leave the skeg white, but the thought of the amount of effort it would take to tape it off was too daunting after I'd fussed with all the little tape joins on the hulls.


Friday, 20 May 2016

Sail & paint

The sail is almost done now. I need to put ties on the top for the yard, and reef points.
In the photo below I was determining how long the bamboo yard and boom need to be, and how much mast will be above the yard:
I wrapped the bamboo with some glass in epoxy between the ridges, to hopefully prevent cracking.

Painting is on-going. The hulls now have three coats of white. The decks and cockpit have three coats of sand tone.
 
On the main hull, the side and bottom planks will be red, and possibly the coaming and around the aft hatch. On the amas, I'll paint a red stripe under the sheer on the outside of each hull. A couple coats should do it for the red over the white, but we'll see.


Saturday, 14 May 2016

A Sail!

Thanks to my marine artifacts collector friend Andrew, I now have a sail and a mast!
The sail is a jib from a sloop. The sailcloth is a medium-light weight with a nice hand, possibly from being around so long. In the photo above, the luff is at the bottom, the foot at the left. As you can see, it's not exactly per plan, but I like it enough to go ahead with it. (It's red!) I'll bring the yard up so that the mitre seam ends at the throat, and bring the leech in at the peak (i.e., leave the leech as-is). The yard will be a bit shorter than the plan. This might bring the area down to forty square feet from 42.

The mast is a hollow carbon fibre sailboard mast. I'm shortening it, and adding glass in epoxy to critical areas.

Seagull dreams on sunny rock amid gentle wavelets in Victoria Harbour.


Painting

This step has been long-awaited! This is a fairly simple project, but it seems like it's gone on for a very long time.
The bottoms got their first coat of white. The plan is to have the bilge planks white, the vertical sides red, and the decks either blue or sand—we'll see. I like to put down a coat or two of white under any colour, to make it more brilliant. The amas will be white with a red stripe under the gunnel. If I have enough red, I'll also put it on the bottom plank—there's not much left over from Firefly, so I might need to buy another quart. I'm using Pettit's "Easypoxy". It goes on beautifully with the little foam rollers.

Seagull dreams on sunny rock amid gentle wavelets.

Saturday, 7 May 2016

Ama connections

I made a couple fibreglass sleeves using epoxy resin, and cut them to fit the decks of the amas.
Next they get filled, faired, and drilled for pins that will hold them in place.

So this is what she looks like all together, right-side up:


It looks like the amas will be just kissing the water when the boat is level. They are extremely light.