Sunday, 13 July 2014

Cockpit

I started the day today by vacuuming the whole interior of the boat. Yes, there will be some sawdust flying yet, but we're coming down to the wire and the boat needs to transition from a workshop to a boat!

Then, I was so curious to see all that was under the cockpit floor board, that I pulled it up. The trick to that is that the cockpit bench tops overhang and get in the way of pulling the floor board up, so the bench tops needed to be taken off and stashed. But then all the stuff that had accumulated on them had to get cleaned up and sorted away first.

I forgot to take a photo before I started in with the cleaning, but remembered before too long:

You can see water stains, like here:
and here:
Haunted by the bull of Pamplona?
I didn't like the look of that corner; there were too many needles sticking out. I'm sure it was watertight, but I wanted to clean it up anyway.
It turned out that there was a bit of a lip that had a void under it, so I ground the wood off even, and put in a fillet with 9-oz cloth over it:
That's all I'm doing in the cockpit for now; the rest looks good. If I make the alterations I'm thinking of (self-bailing cockpit), this might change anyway.
The ring in the foreground is something I put onto the inside of the eye bolt that makes the upper gudgeon. I decided that, rather than saw the extra inch off, I'd make use of it. Who knows...

After the cockpit was cleaned out, I sanded and painted the floorboard, the little step-boxes just ahead of the cockpit benches, and the after end of the floor itself, as the floor board doesn't cover it all. Also put the second coat of white on the window frames outside. Finished around 7 pm.

I'm considering painting the cabin doors dark brown, like the rudder, and the after side of the cabin the orangy wood colour of the mast, the cabin top and the yet-to-be-painted decks. The transom also will be that colour. I'm trying to get all of one colour ready so that I can do it all with one opening of the can and one roller and tray cleaning. The white on the cabin sides will go on next. Three coats each colour.

It's very pleasant working under the new tarp. Because it's open-sided, there is good air flow, nice breezes.


Friday, 11 July 2014

Some interior work, new tarp

A photo to show the bow cleat backing board and plate, as promised in an earlier post:

Starchy came over and helped me fasten some strengtheners on the inside of the cabin. This solved the problem of the delaminating ply on the starboard side.
 The port side was done as well, to keep things balanced.
We also put in backing pieces behind the main chain plates:


The tiller is coming along:

I took the following photo because I liked the port and starboard boats:
Little did I know that that would be the last time she sheltered under that tarp!
I started to make a sun shelter to paint under, and realized that: 1) It was going to be permanent; and 2) The old tarp was in the way and I had to let it go. It really was deteriorating: little green shards an eighth of an inch long were raining down constantly, making it unsuitable to paint under.

The new tarp was originally purchased to build the boom tent out of. The idea to rig it up as a sun shelter sort of happened organically as I put one foot in front of the other in the baking sun.
It's held up by the ½" PVC pipe that I bought for the boom tent (plus some more purchased for this tent), and it's strung out to various solid things in the yard, including the trailer for the Thunderbird.
The PVC pipe is connected together with elbows and tees, and the cross-pieces are tied to the mast.
There's room to walk under it, and it's almost high enough to comfortably paint the cabin top under.

Thursday, 26 June 2014

Getting closer

New neighbour. Calls me "shorty" or "fatty" depending on her mood. ;-)

Cabin interior showing newly painted floors and floorboards. The grey I found is much darker and bluer than what was on her, but I like it:

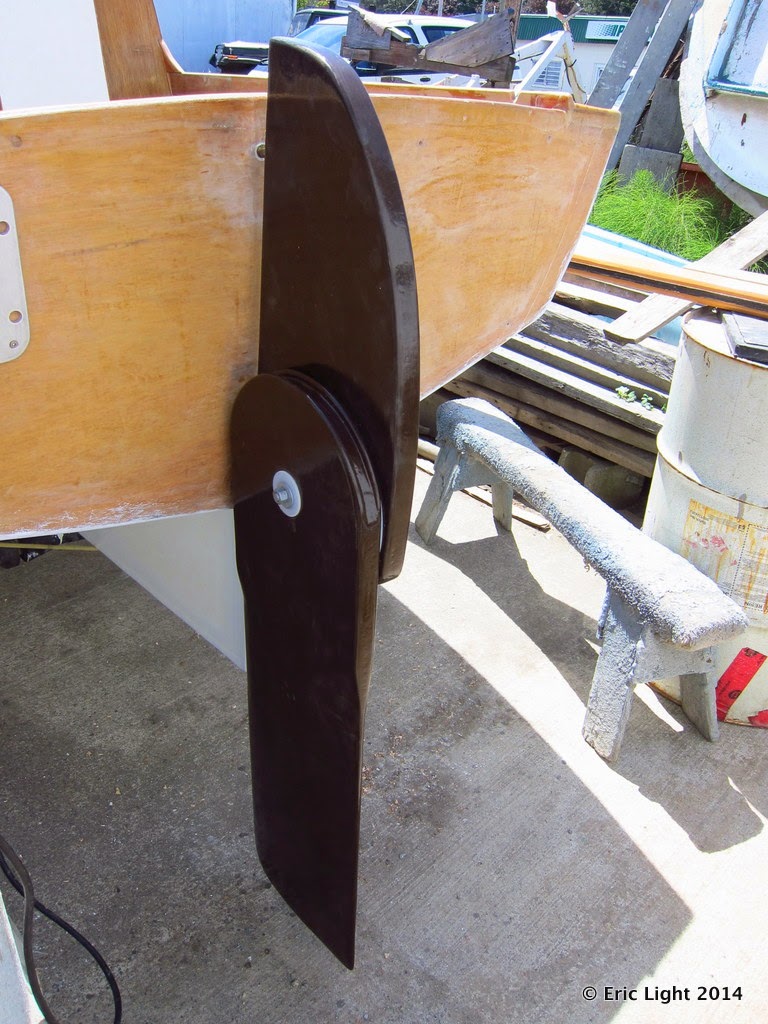
Finally finished painting the rudder pieces and got them put together. This is the blade in the down position:
The white bit showing below the rudder head above is a piece of one-eighth inch UHMW plastic which will serve as an oversize washer between the two parts. It's already shown me its Achilles heel: a piece of grit got between the washer and the rudder and made a circular score in the wood. Must make sure to clean before re-assembling.

Below is the blade in the up position:

More rudder shots:
Check out the groove for the downhaul to run in!

Tiller!

Finally got to cutting the basic shape out of the tiller.
Not sure if the after end will stay like that; probably will get some rounding instead of that point at the bottom.

The idea is to have a round-shafted tiller with a ball on the end. We'll see how it falls out... Also, I haven't figured out yet where to attach the free ends of the up- and down-hauls for the blade. Under or on the tiller would be best, but the tiller is on the opposite side of the blade in order that the blade can achieve the vertical up position. May have to re-assess the value of that. Meanwhile, I'm thinking of leading those lines over top of the transom and down to a cleat on the inside. In that case, for the downhaul not to lift the rudder out of the gudgeons, I'd have to put a pin of some kind through one of the pintles. Something I should do anyway, to keep the rudder from separating from the boat in an upset.

Mast

The mast is now painted. I hadn't realized that it was hollow all the way to the bottom. I didn't like that, so I put a piece of wood in the middle, to just above the pivot pin. Which meant I had to take the pivot pin out. It was very well made and so difficult to extract that it had to be demolished. In its place I installed a piece of ¾" stainless pipe that John Booth gave me. Stronger than ever!
You may notice that the cabin top has new paint the same colour as the mast. I've changed my colour scheme slightly. The two-dimensional drawings didn't show the deck, which must be factored in. So the deck will be the same woody colour as the mast and cabin top, and the cabin sides will be white. Because the decks couldn't be white.

Firefly could be a couple weeks away from launch. Except that my eldest daughter and her family are visiting for ten days, so it will be more like three weeks. Really soon!


Tuesday, 10 June 2014

Rudder... and Tiller too!

I put .73-oz glass cloth on one side of the rudder pieces today as well. That's very fine glass, but the plywood needs something in addition to the epoxy to keep the grain from lifting, and I wanted to keep the epoxy to a minimum (hah!). Pretty fussy stuff, but it takes corners like a hot-damn...


New Tiller

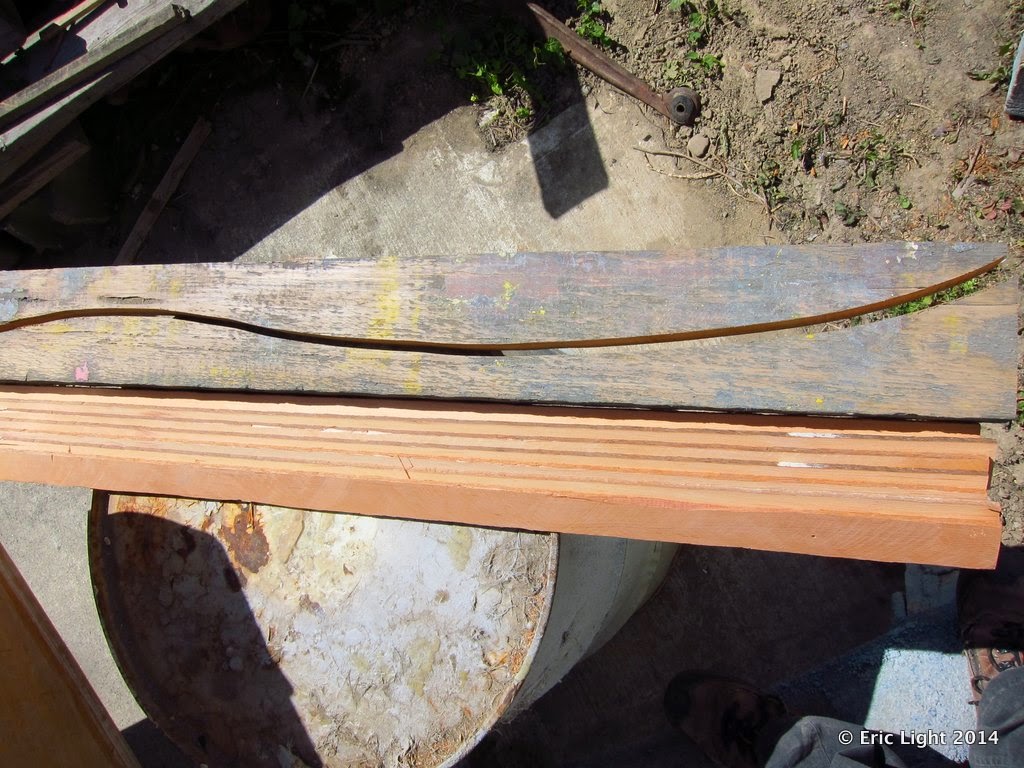
On Monday afternoon John helped me laminate a new tiller! The photo below shows the form—just a thick plank cut to the desired curve—and the pieces of fir that I sliced from that tiller blank I showed you in Sunday's entry.
The ¼"-thick pieces were stacked up with glue between them, and clamped between the two pieces of the form. John pinned the ends with small finishing nails so they wouldn't slide around too much. We're letting it harden for a couple of days before removing the clamps. Thanks again, John!
    To get the shape I wanted for the tiller, I clamped a piece of ply to the rudder head and drew on it, then made a tracing of that on clear acetate. I cut the acetate, laid it on the plank, and drew the line on the plank. The plank was cut with a band saw. And of course the form had packing tape on it so the glue wouldn't stick to it.


Keel done!

This feels like the top of the hill, and from here on it's going to be a sleigh ride. I fitted the missing keel piece, and covered it with two layers of glass tape in epoxy.
Sanding and painting come next for this bit.

Sunday, 8 June 2014

Re-installing hardware; rudder

I finally got the holes in the right places for the mizzen mast step and partners, and for the rudder gudgeons. I drilled over-sized holes first, filled them with thickened epoxy, and then drilled the holes for the fastenings into the cured epoxy. This is so no water gets to the wood via the fastenings.
The bottom gudgeon was a little tricky, as the two bolts  closest to the centreline had to be angled outward to miss the transom knee on the inside with enough room to put a washer and a nut on. This was John's idea, to put them in on an angle—I wouldn't have thought to do that, but it worked fine. The upper gudgeon is an eye-bolt. I'd like to find a threaded eye to put on the inside of it, as there's lots of bolt coming through and it may as well be put to another use rather than just being chopped off.
Speaking of which, I cut half an inch off the upper pintle so the rudder will be easier to ship. There's still lots of pintle there:
Next is to figure the best size and shape for the tiller. Another beautiful piece of John's fir is the blank. In the next pic, the mizzen mast step looks like it might be the lower gudgeon but it isn't:
On the other end of the boat, the stem head fitting is fitted, the eye bolt in the stem is fixed, and there's that shiny big foredeck cleat again:
She's winkin' at ya! ;-)

Keel Repair

The plan to bend in plywood across the top of the keel didn't work, as there wasn't enough of the keel to fasten to. So I just started layering up the bottom of the boat over the keel with 3/8" plywood.
Layer 1:
Layer 2 (getting wider):
I finally figured out how to do what I wanted to do by layer 3, and used much less epoxy and more wood. One and one-eighth inches of wood and epoxy in total were added, with a layer of 9-oz cloth over all. The ground-away butt blocks were replaced with two or three layers of 4" glass tape in epoxy:
Next came a re-make of frame 5, making sure to keep the floor boards at the same heights:
Success!
And here's how it looked from the outside. I put one layer of 9-oz cloth over the wound. I'd like to put more layers on, but working upside-down under a trailer is not conducive.
John gave me a nice piece of fir to replace the excised keel. That's the next and final step in fixing the keel rot.

The new theory of how the rot came to be goes as follows: The boat was meant to be kept in a garage, and the corners of the decks and cabin weren't waterproofed. When the boat was kept outside under a tarp, water got in through the tarp (they always leak, especially on the tight corners) and collected in the bottom of the boat, eventually making its way out through the keel (maybe down a screw that had been worked loose by one of the trailer rollers) and allowing rot to start.