Friday, 8 August 2014

Waterline launch

John Booth spent about two hours modifying Firefly's trailer so she could back far enough into the water to float off of it. First, four seized bolts had to be cut off. They had nuts on the inside of the galvanized steel tube that could not be reached and which were rusted on. They were replaced by two bolts that went all the way through:
Then an aluminum tube was ground down on four sides to fit into the tongue tube, with matching holes at each end,
 so that now four bolts held the whole together:
The extension was attached after towing the boat to the ramp, and was taken off before towing her back to the shop.

Here she is in the water:
 There's still blue masking tape on the transom, as it needs another couple coats of paint.
She floats very high. I went aboard briefly, and she felt quite stable.
(That's, right to left: Starchy, Josie, and Bill's friend Tommy.)

Now back to the shop for hand rails, bottom paint, and the beginnings of a cockpit cover:


Thursday, 7 August 2014

rub rails and a near launch

Thanks to Starchy's help, the rub rails are fastened and bedded.
(Outer part of rub rail isn't fastened above; photo shows shape.)
Ready for launch!

Near Launch!

We took Firefly to the Fleming Beach boat ramp in Esquimalt, to launch her so that I could strike the water line:
This boat is resistant to completion, I tell you! The trailer wouldn't go into the water far enough to float the boat off. Can't tell you how excited I was to be finally seeing this boat float. But never mind, there's still lots to do. John is working on an extension tongue for the trailer, and possibly we'll use his truck instead, as the back wheels are farther forward of the hitch.

It was very sweet watching her saunter down the street all pretty-like, with her little white transom and red cheeks. I followed in my car, watching people admire her as we passed.

Here we are back in the industrial zone, where she seems most comfortable:
Note that the decktoads are now installed. (They're to hold the bottom ends of the cockpit tent poles.)

TIFN


Saturday, 2 August 2014

Toe & rub rails, decktodes & a shelf


Starchy came over and helped me with the port rub rail. It went on well. The toe rails I put on a couple of days ago are the originals, sanded and painted. All has to come off, to get bedded with Sikaflex as it goes back on again.

 The half-round will go on the outside and cover the screw heads, mostly.
The decktoads are just sitting there yet, as toads are wont to do. They'll be fastened from beneath with ¼" screw bolts with fender washers and bedded with Sikaflex as well.

My happiest accomplishment today, though, is this little shelf I made in the foc'sle, from the table that came with the boat. Maybe I'll regret some day not having that table, but right now it's the apple of my eye as a shelf:
I'm considering putting a lip on its after edge, but also thinking of some kind of netting or some other way of making containment possible, so that things don't move off that after edge in a sea. Ideally, a bulkhead would go there, with water-tight hatches to access the interior, but that's beyond me right now.


Friday, 1 August 2014

Tiller, decktoads, cleats

The tiller is getting varnished in the cabin of Firefly, hanging from a line. I think it has four coats now, on top of one coat of S1 sealer (thanks, Godfrey!). I might put six coats of varnish on altogether. Or I might lose track and not know just how many coats...
(Notice that Firefly is not level, as the lot is slanted.)

Not seeing the curvature in the length here; that will have to be another day.

I bought a nice piece of fir from the Finishing Store, ½" x 3" for the rub strip, which John Booth sliced for me into two lengths (16') that were 1" on one side, and 2" on the other:
Thanks to John's skill, both pieces are identical. It's a bit tricky to set the saw up so that you get equal pieces on each side of the blade kerf.

A ¾" half-round will bring the total width out. Putting two smaller pieces on such a curvy boat will be easier than one larger piece. Although—even the larger piece of these is much more supple than I thought it would be.

The shape is designed so that when the boat comes down against a dock, there's not much to catch on.

The rub rails won't reach all the way to the stem, but the bow is so high they're useless there anyway. They will be the same chocolate brown as the rudder, the doors and the toe rails.

This is how I set up the half-rounds to make bevels for scarfing, to get the right lengths:

I made the bevel with a grinder, free-hand. It was acceptable. I didn't want to spend too much time on it.

I re-shaped the deck toads, as I'm now calling them. They're bases or sockets for the pipes that will hold up the cockpit tent. Aka decktodes. (Did you see the movie Cane Toads?)

Positioning the stern dock cleat:
That's not where it finally went. I put them close to the aft corners, backed up with a piece of ⅜" ply under the deck, tight fit between stringers, transom, with lots of epoxy goop. There are four ¼" bolts per cleat.


Sunday, 27 July 2014

Seeing red

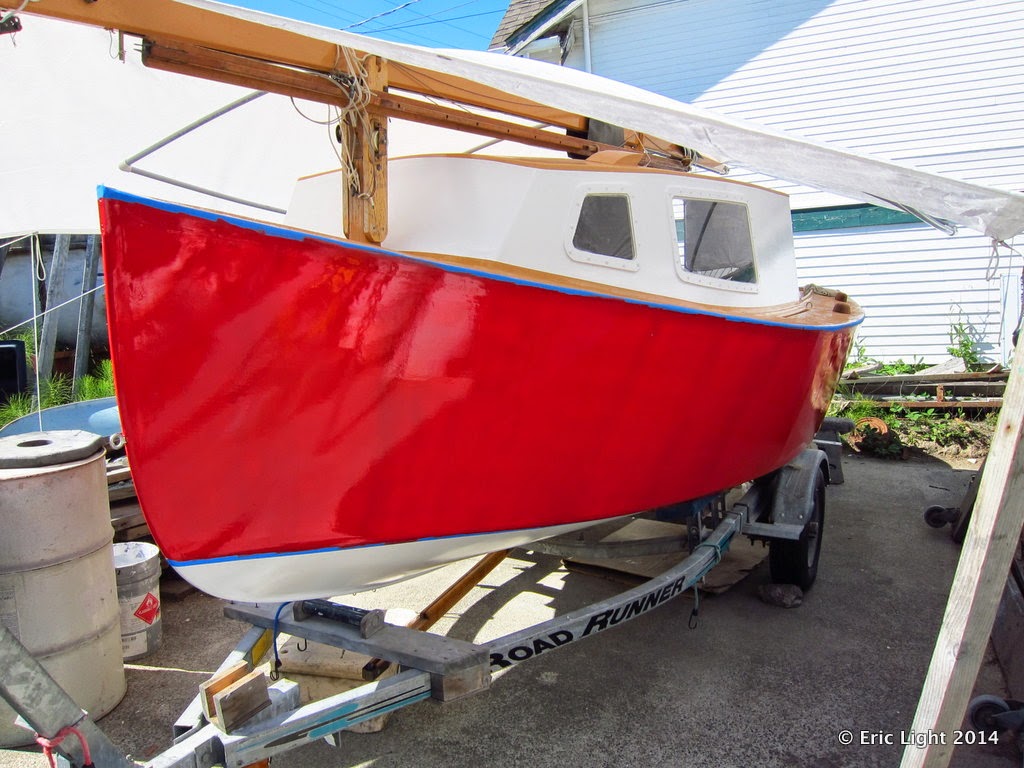
Now there are two red hulls!


I'm starting to get excited!


Saturday, 26 July 2014

White cabin, brown doors

The whole cockpit has been re-painted now. Buff is Brightsides, white is Easypoxy (as will be the red), brown and grey are Rustoleum.

Three coats of white on the cabin sides meant I could take off the tape and see what it looked like. I like it! Now, try to imagine red topsides...

Those tapeless cabin sides. The inside of the brown doors are white.

It seemed like a good idea at the time... guess ya hadda be there.


Thursday, 24 July 2014

Cockpit, deck, colours


John convinced me that I should fix up the rest of the central area of the cockpit floor, especially the limber holes. So I did.

Non-skid on the decks:

Aft face of cabin painted:

I like how the colours go together. I wasn't sure of the darker, bluer grey, but I see that it goes well with the "sundown buff":
Those doors will be chocolate brown.
Ready for a white cabin?

Let there be white!

Finally realized that the transom should be white, too. I was going to paint it the same buff colour as the decks, etc., but saw that it would be too much buff. So white it is, the white coming up from the bottom panels.
I find it hard to imagine what a part will look like if it's a different colour, but I think the colours are coming together well anyway. The sides will be brilliant red.